


Productivity Strategies, Podcast Articles | Aug 28, 2022
3 ways to create teaching templates that will save you 5-10 hours a week

By Marguerite Redelfs
3 ways to create teaching templates that will save you 5-10 hours a week
By Marguerite Redelfs
I’m going to tell you something I’d never, ever tell my students: please spend more time copying and pasting.
Yep. Wear out the CTRL, C, and V keys on your keyboard!
Now, I don’t mean anyone should go out and plagiarize. Instead, you can save yourself huge amounts of time by reusing your own work. I’ve developed a plan to create reusable resources that saves me between five and ten hours every week.
One major shift in my mindset that I learned through the 40 Hour Teacher Workweek program has helped me in many situations:
We often focus on saving time right now. Considering how we can use our current work to save time for ourselves in the future, though, can be a game-changer.

The template creation process
The key way I apply this idea to my work is by building templates. Templates combine two techniques to streamline teachers’ workflow: batching and using technology effectively.
I remember my concerns about templates a few years ago: “When could I ever do that?”
I knew it would save time in the long run. But whenever I considered the time I’d need to invest in developing a template, I gave up.
This year I’ve realized I can build templates while I’m doing my daily work, which saves time and batches the work I’ll be doing in the future.
Now I love templates. They boost my productivity and focus my attention. When I notice that I’m repeatedly spending time on the same type of task, I evaluate whether a template might be helpful.
Templates are most effective when a task is repetitive, generalizable, detailed, and time-consuming. If a template might be effective, I build one as I work.
Here’s how:
- Start a new document and include “template” in its name.
- Keep doing my work. When I write something I’ll reuse, I copy and paste it into my new template.
- Organize my template with headings (as needed).
- When I start the same type of task later, I open my template document and copy and paste what I need! I use search features and my headings to find what I’m looking for.
Here are three ways I apply this process every week.
Template process #1: Student accommodations
Avg. time saved for me each week: 3 hours
Accommodations are crucial — and time-consuming. I used to spend hours each week planning, implementing, and communicating about accommodations. But I still felt I wasn’t giving each student the best I could offer.
Because I teach online, I communicate about accommodations via email. While spending another afternoon writing individual emails to my students about their accommodations, I realized this was the perfect time for a template! I repeat this task every week, usually taking several hours. Although each student’s needs are individual, many of their accommodations are similar. So I followed my steps!
First, I created a list of all my students’ accommodations. That was already eye-opening: I realized I only need to communicate about a few accommodations regularly. Once I set up certain accommodations for students, they become routine. I don’t need to check in on them or remind students about them every week; I only need to focus on a few. The list was named “Accommodations Template.”
Now I use that template whenever I consider accommodations. I add a new heading with the date and copy and paste the list below. This gives me a handy, organized timeline of how I’m implementing accommodations. Each week, I type my instructions to students under each applicable list item.
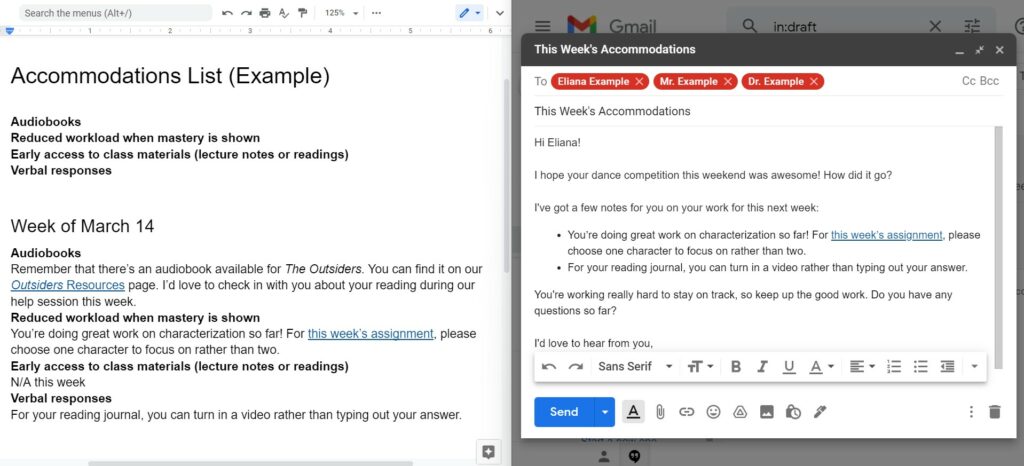
Finally, I send my emails. I check which accommodations each student has, then copy and paste them from the template. That’s when I personalize them for each student. I tweak those general accommodations and add any specific notes I think the student needs. I also CC parents, guardians, and case managers as needed.
Planning all my accommodations at once lets me batch my thinking about how to accommodate each child’s specific, individual needs. I can check in with each child with a 504 or IEP, communicate with their parents and case managers, and share information for the week at one time.
Steps:
- Create my “Accommodations Template!” List the accommodations.
- Type out the accommodations I need for the week.
- Use headings to track dates and record what I’ve done.
- Write individualized emails by copying, pasting, and personalizing the template accommodations.
Template process #2: Instructional materials and activities
Avg. time saved for me each week: 3 hours
Templates also save time when creating class materials: assignments, teacher materials, instructions, and common formats. Once I realized how much time I was spending creating similar types of materials over and over, I knew I needed templates.
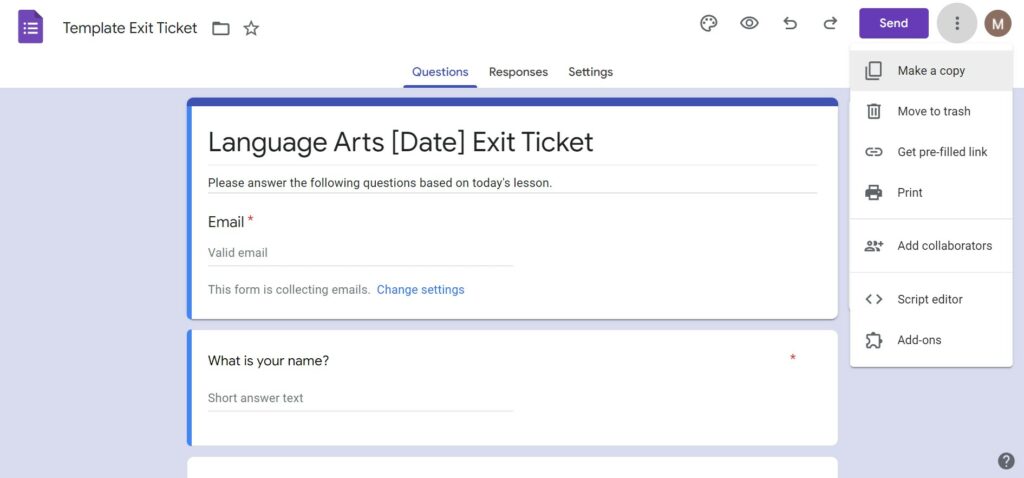
Now I’ve developed templates that match the most common activities in my classroom. This helps since I will keep creating the same types of activities with similar patterns and instructions (like warm-ups and exit tickets). Formatting, perfecting phrases, and editing are tasks I can spend excessive time on. A template minimizes that issue too.
I use several templates weekly, like quiz instructions, warm-ups, class slides (with an agenda, announcements, my lesson, and activity instructions), and exit tickets. I also create templates for less-frequent lesson formats. In-class discussions, RAFT writing responses, breakout rooms, and reading journals all have templates I can copy, paste, and tweak for my lessons.
This has several benefits. If something I’m doing is effective, reusing it saves time. It also increases comfort and familiarity for students. They can spend their attention thinking about new knowledge rather than figuring out the activity’s format.
Saving these templates during daily lesson planning is the key. The first time I try a new structure or assignment type, I make my lesson. The next time, though, I remember I’ve already created materials of this type. I find my previous lesson, copy and paste the parts I like into a new template, and use it to make my current lesson.
Steps:
- When I notice I’m teaching with a familiar structure, make a new document named “Structure Template.”
- Find the last (or best) time I taught using that structure. Copy and paste the reusable parts of that lesson into my template.
- Keep lesson planning!
- Use that template as a resource every time I teach using that structure, revising and improving over time.
Template process #3: Comment banks for student feedback
Avg. time saved for me each week: 1.5 hours
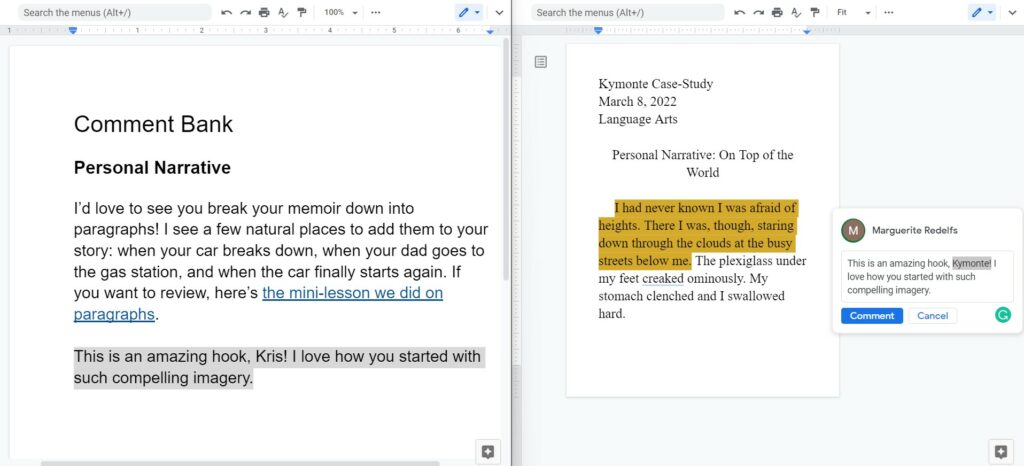
As a language arts teacher, I give a lot of individual feedback on writing. To save time and still give specific, personalized feedback, one common suggestion is to develop a comment bank. My feedback to students often focuses on the same general ideas and consumes a lot of time. That makes it a great place to use a template.
Here’s how I create comment banks as I grade: I grade, sharing my feedback with individual students. Whenever my feedback is something I’ll repeat, I copy and paste it into my comment bank. When I want to give the same feedback later, I can copy and paste it from the comment bank, retooling it to fit this student’s work.
This solves my biggest hurdle when implementing comment banks. In the past, I struggled with time: When do I have the time to build comment banks from scratch? I don’t, but I certainly have time to copy and paste a comment I’m already writing into a template. After using this process for a few essays, I have a general comment bank I can keep using forever.
Steps:
- Create a “Comment Bank” document.
- Grade! When I write repetitive feedback, copy and paste it into my comment bank.
- I organize it by making a new heading for each assignment or skill within a unit.
- When I want to give similar feedback, I copy and paste it from my comment bank, then personalize it.
This is the essential process I use to streamline my work. I find the tasks I’m repeating. While I’m working, I use technology to create a lasting, replicable version. Then I organize it to easily find and reuse later. This saves me time daily so I can focus on what matters most in my job and my life: teaching students not to copy and paste.
Creating templates has saved me HOURS of time every single week, and it’s just one of the strategies I developed through the 40 Hour Teacher Workweek program. I hope this helps you streamline and simplify your workload, too!
Sponsored by 40 Hour Teacher Workweek
Want to do a deeper dive into this topic? Check out my interview with Marguerite about her process on episode 260! Use the podcast player above, or subscribe to Truth for Teachers in your favorite podcast app.

The Truth for Teachers Podcast
Our bi-weekly podcast has received over 1,200 five star ratings + 9 million downloads. You can support our work by subscribing in your favorite podcast app for free!
Explore all podcast episodes


Marguerite Redelfs
Sign up to get new Truth for Teachers articles in your inbox
OR

Join our
community
of educators
Share ideas or get advice via our social channels.


