
Lots of teachers are dumping their desks to make more space for student learning. While there’s certainly nothing wrong with having a teacher’s desk in your classroom (I was never bold enough to get rid of mine!), some teachers don’t want a desk because it takes up so much room, attracts clutter, and rarely gets used because teachers never have time to sit down! The big question, though, is HOW do you do it? Where is all of that stuff supposed to go? Jennifer Gibbons from Teaching with Grace is here to share her method for staying organized without a teacher’s desk.
When I student taught, it was next door to a classroom that had piles of stuff everywhere. The teacher had taken over the room. Students always learn better in a room that is not filled with distractions and where they feel as though they can move about without fear of knocking anything over. Which is why I have always tried to improve on my own organization.
Angela’s site, The Cornerstone, has always been dear to my heart for this reason! Shortly after I began teaching, I found her original website and my classroom organization and management was FOREVER changed! This has always been the site for me to come to if I have an organization challenge.
As an organized teacher myself (after reading all of Angela’s content over the years) I am always looking to improve in one area specifically: decreasing my space while increasing student space. In the beginning of my teaching career, I have to say that my space was way more than it should have been. I want to share with you how I have reduced my space. By limiting my space, my student’s are able to move around the room to work, to use resources, and to focus on their learning.
One way that a lot of teachers have been decreasing their space is to get rid of their desks. I can understand this since it’s big, bulky, and we hardly ever sit!
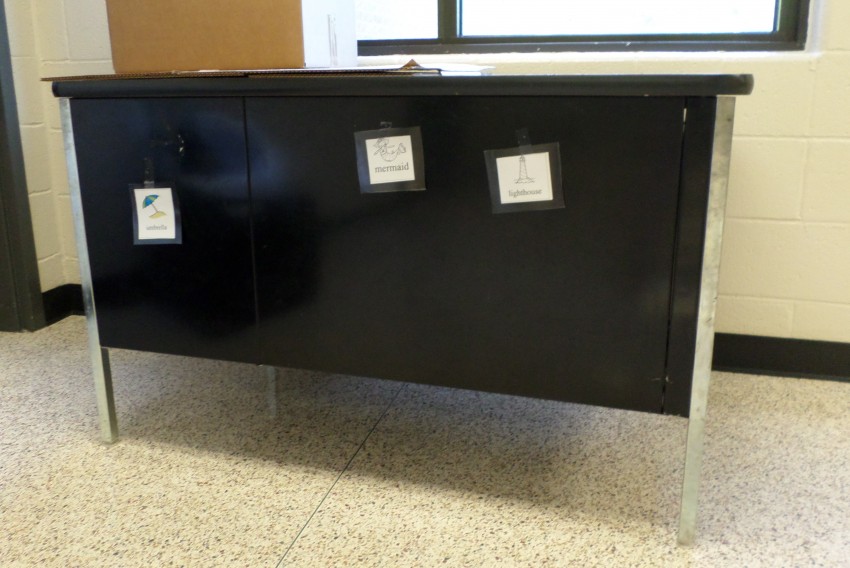
But, consider these points:
- Where will you plan?
- If you say your back table, will you be able to keep your stuff separate from your instructional materials?
- Where will you keep your supplies?
- Where will your personalized items be?
When you begin to think about it, it may be a better idea to simply replace your desk. Let me show you what I’ve done in my room that has worked wonders! To begin with, I have reduced my space to just a corner in my room. Here’s my corner:
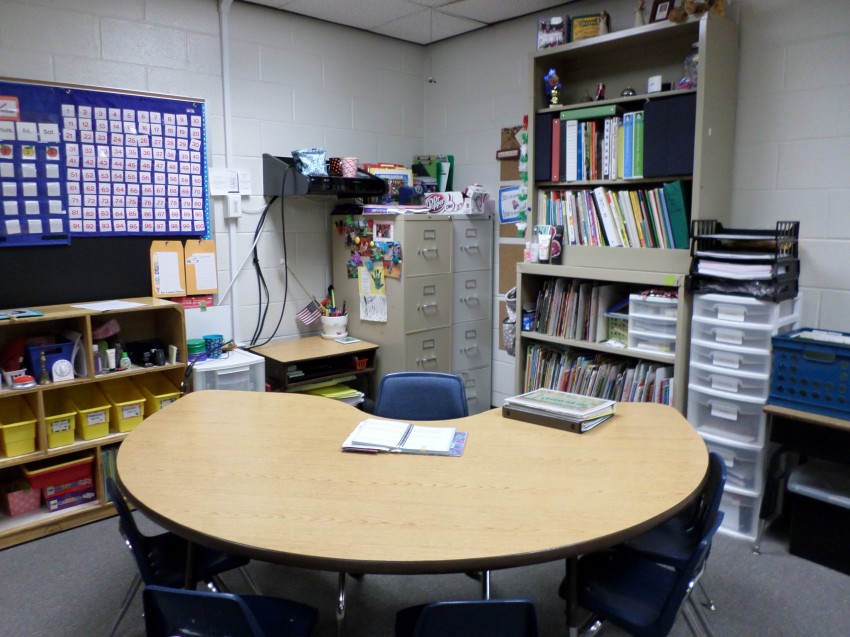
It’s not even 1/8th of my entire classroom. Below you can see all of the student’s space:
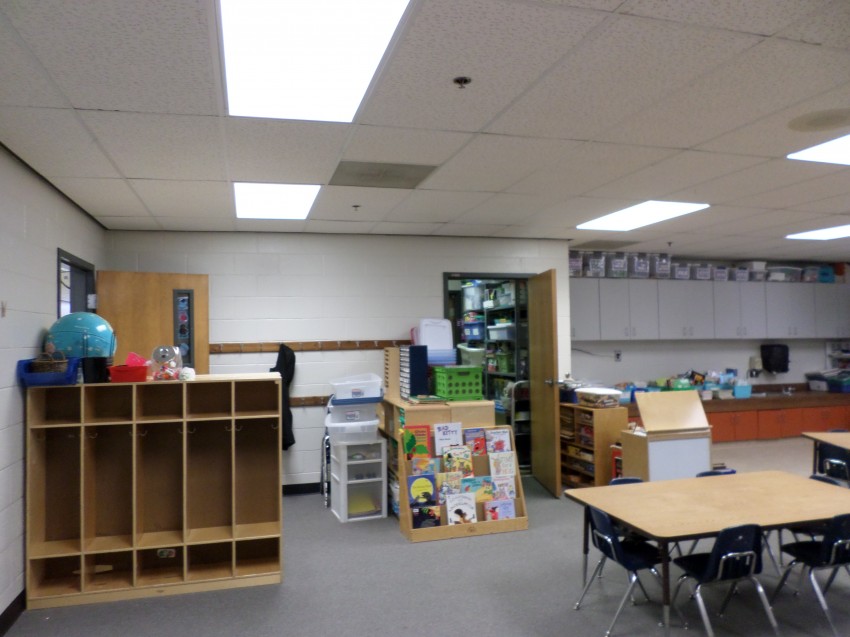
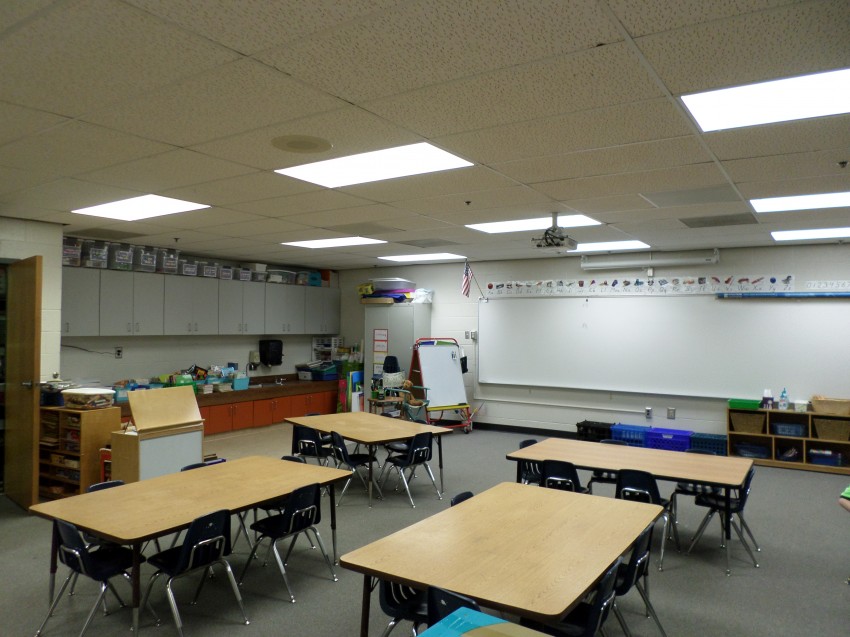
I even let them have my back counter. This is where we eat breakfast in the morning and where we do listening work station during our Daily 5 time.
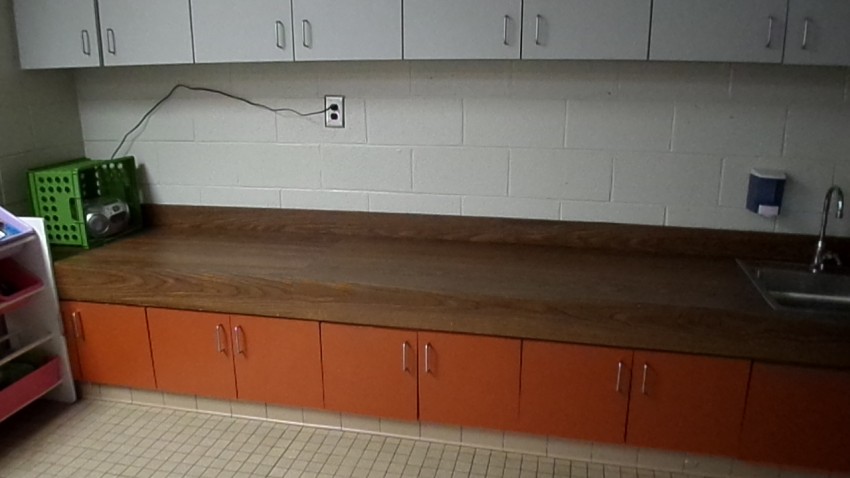
I have taken the time to really organize all of my materials in the best possible way so that I am organized and not constantly in search of all of my materials and supplies while I should be teaching. Here’s a close up of my desk:
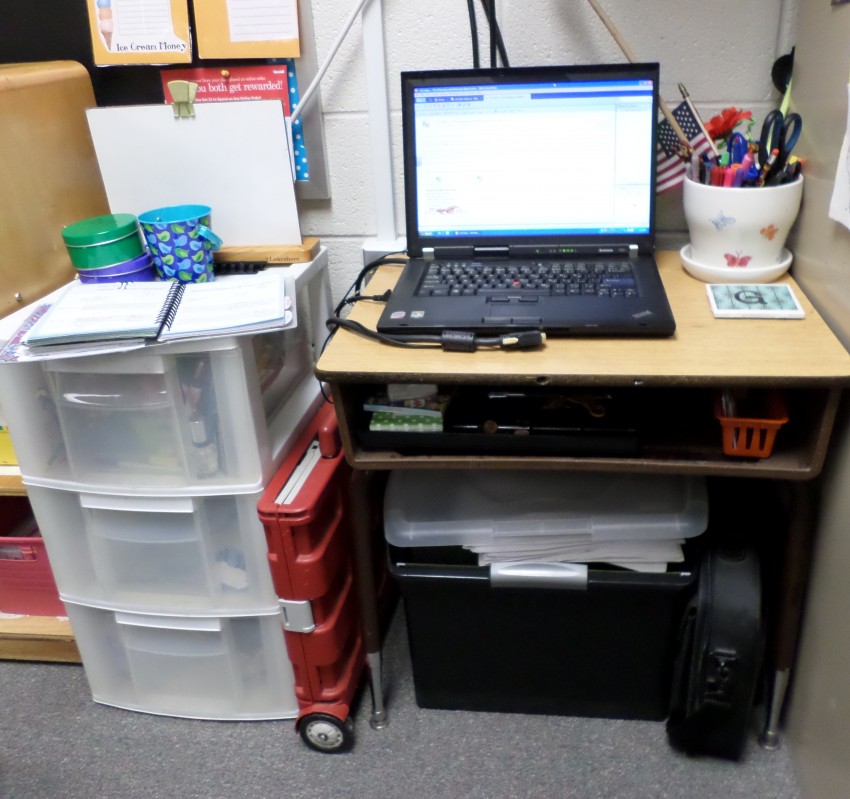
I snagged a student desk that I have used for two years now as my desk. It is the perfect size for my computer. On top of the desk is also my container of FAVORITE writing pens and markers to grab from. Inside the desk is a desk organizer that I grabbed like this one:
I use this for organizing those important (but tiny) supplies: coins, dice, safety pins, etc. Underneath my desk are student files for the year. This is where my rubrics and portfolios for conferences are. They are always right at hand AND easy to take home if need be! The biggest help is my white 3-drawer container to the left of my desk. The top drawer holds ALL of my other writing implements (all grouped and organized): markers, pens, pencils, etc.). The middle drawer has index cards, note pads, rulers, and stickers. The bottom drawer holds any other miscellaneous items that used to be in my desk (gloves for winter recess and the like). On top of my drawers is my planner, containers for small daily used manipulatives, and my small group white board. All of these are the most highly used items at my back table.
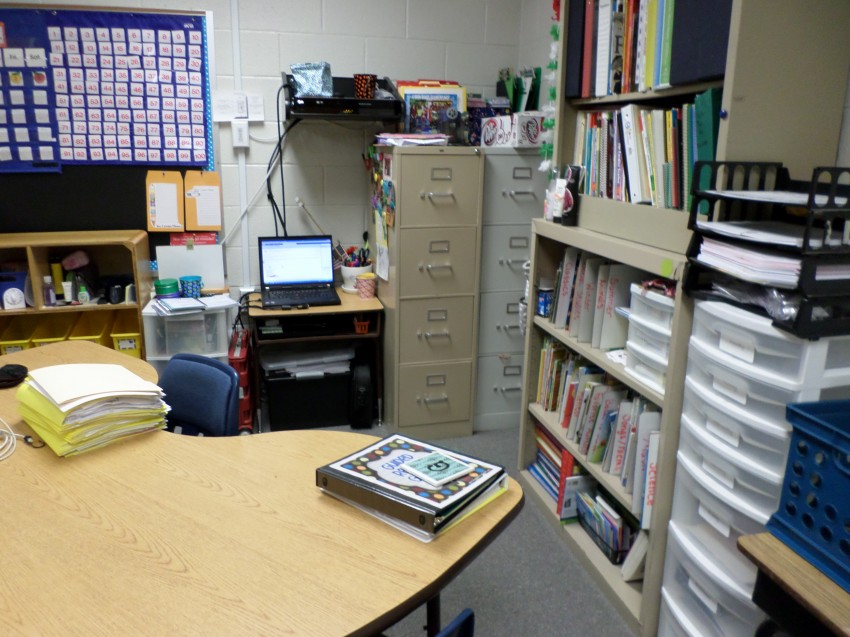
If we come out just a little bit, you can see I utilize all of my space in my corner. On top of my filing cabinets, I have a file folder holder. This holds my ‘To Do’, ‘To Grade’, ‘To File’ folders. There is also a magazine holder that has my teacher clip boards and my giant sticker container.
The white tower is organized by days of the week for all of my instructional materials need that week. The black tray on top holds items to go to the office, to keep on hand, and small whole group activity games that I use throughout the year.
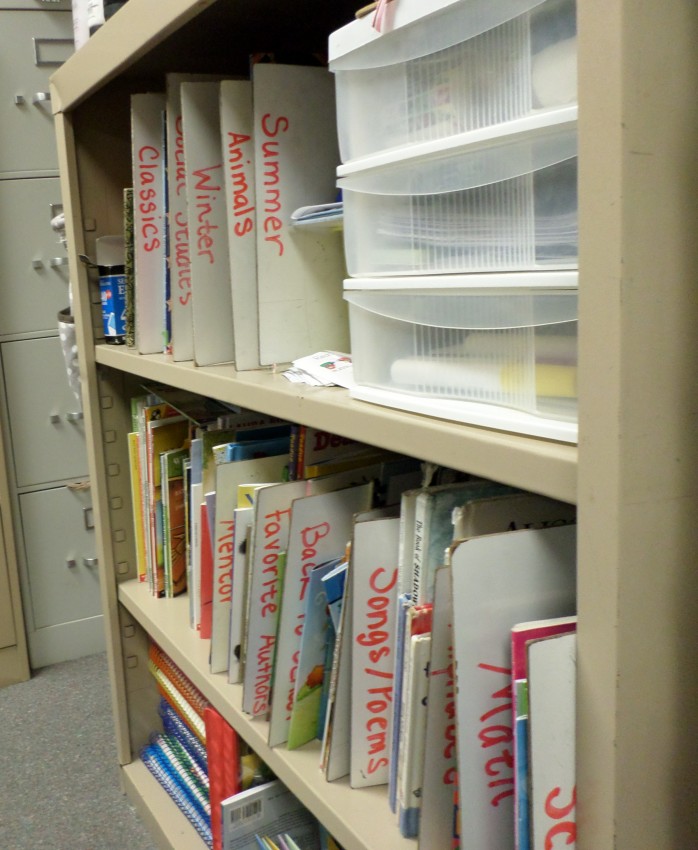
My bookshelves are one of the very best things that I have done. By stacking them (with permission from my custodians) I have reduced my corner a lot! But I still have all the same storage. If you look at the picture below, you can see how I have organized all of my read aloud books by subject. I use this drawer container for my poster markers, birthday treats, and other stickers.
To the left of my corner is my newest change and I love it! I place my printer on top so it’s in easy reaching distance (but off of my student station). I have left the rest of the top empty because it’s where my document projector (Elmo) lives during the year.
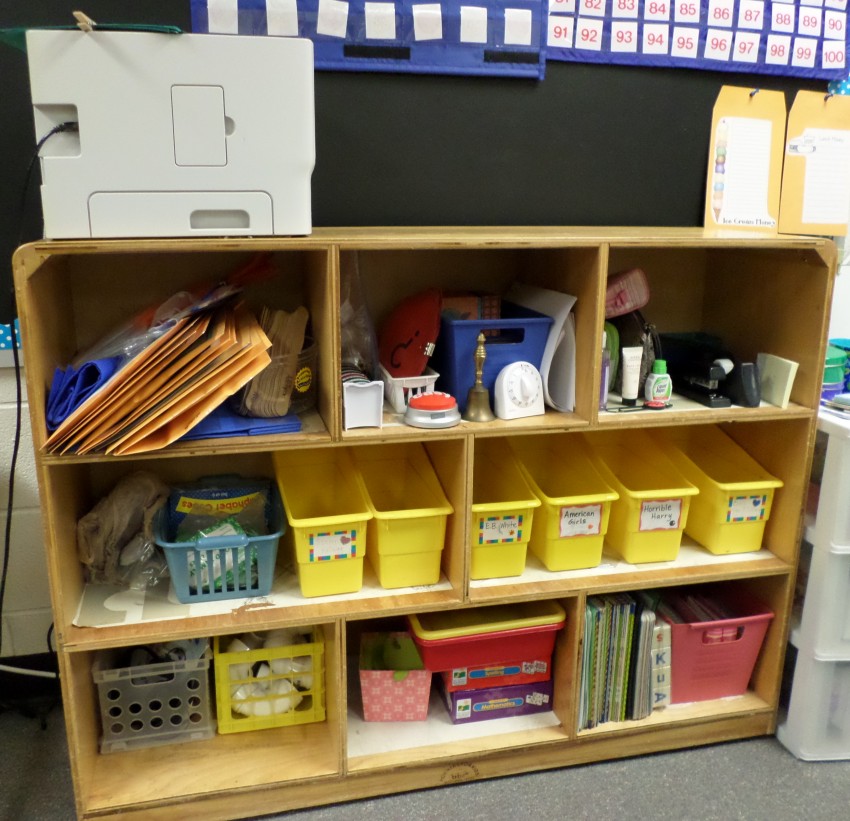
The top three spots hold (from left to right):
- -Small group games and erasable pocket chart for instruction
- -Small manipulatives and stamps for small group instruction
- -Half personal items and half containers for paper clips, push pins, stapler, and tape
The middle row holds a container for alphabet dice and guided reading group containers. The bottom three spots hold (from left to right):
- Homemade Whisper Phones and extra headphones (computer station is directly to the left of this shelf)
- Pointer fingers and sorting boxes for groups; alphabet and word building centers
- Scott Foresman magnetic boards, alphabet dice, and listening CDs
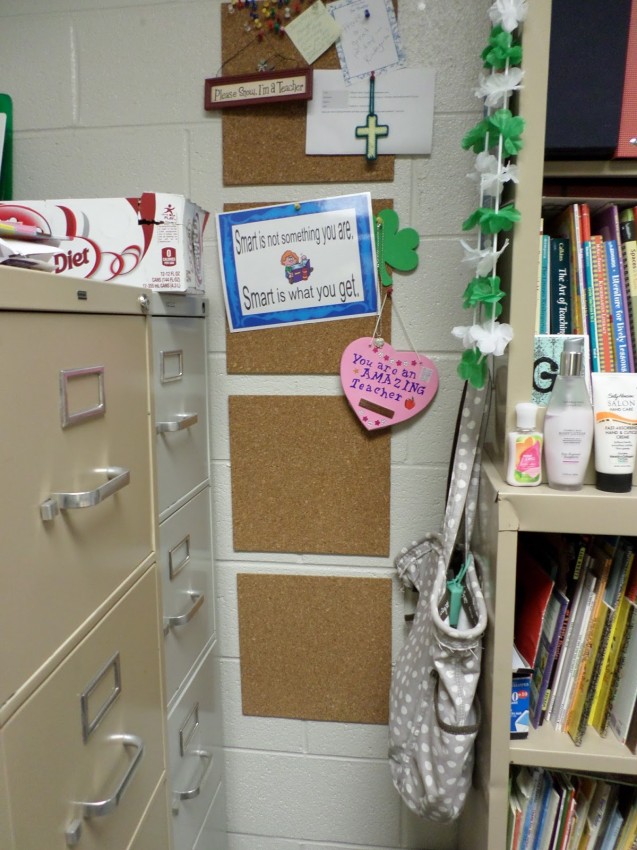
Make sure you use that ‘extra’ bit of space! I placed a 3M hook on the side of my bookcase so that my purse will not be on the floor. It works perfectly! I am totally that type of teacher to trip over things that I leave in the floor. Plus it looks messy to anyone who comes in the room if you have loads of stuff all over the floors. I also have my bulletin board squares in this spot. I hang up my ‘gifts’ from students here. They love to see their work on the wall!
Jennifer Gibbons authors the blog Teaching with Grace. She loves blogging about her classroom, teaching, and her life with her husband and two munchkins. This year is her 7th year in teaching, with the first four years spent in third grade and the last two in kindergarten. She loves to help her students dig deeper and really ‘get’ what they are learning. She’s even spent two years helping to coach groups of students compete in their county’s alternative energy competition building solar ovens! Being proactive is also very important to Jennifer to ensure her students’ success. She has earned her Master’s in reading as well as an endorsement in Gifted. You can connect with her on the Teaching with Grace Facebook page.
Thank you for sharing these practical tips in such detailed and helpful way, Jennifer! If anyone has questions or feedback for Jennifer, please share in the comments.

Angela Watson
Founder and Writer
Sign up to get new Truth for Teachers articles in your inbox
Discussion
OR

Join our
community
of educators
If you are a teacher who is interested in contributing to the Truth for Teachers website, please click here for more information.


Great ideas! If you are working in a science room you can easily get rid of your desk and convert a science bench into a standing desk workspace. The benches are almost certainly the wrong height ergonomically, but with a bit of woodworking, you can do a conversion. Standing desks are slowly gaining popularity at my school with 6 converts so far (mine’s the only science bench conversion though).
They just took my desk away, I nearly cried. It was only a modern slim thing with hardly any drawers. I won’t be able to make a space for myself because we aren’t allowed to have filling cabinets or drawer things… The teacher is not even given a chair.
Can you please tell me where I can purchase the half round table? Great replacement for a teachers desk.